Internet Technologies
Tasks studies - laboratory
Project maintained by dawidolko Hosted on GitHub Pages — Theme by dawidolko
XML (Extensible Markup Language)
XML (Extensible Markup Language) is a language that was created as a way to simplify the syntax of SGML while retaining its main capabilities (i.e. the ability to define arbitrary documents and custom tags). Scribe: link.
When HTML was first developed, style sheet languages (such as DSSSL and FOSI) were already used to style SGML; however, for various reasons (mainly due to their complexity) these were considered inadequate for styling HTML documents.
Initially, several competing style languages were proposed, and gradually CSS prevailed, although incomplete browser support was a problem.
There were also cases when browser developers added their own ideas and implementation choices that did not appear in the standards at all—this only deepened the chaos and delayed the standard’s widespread adoption.
Presentational tags were also used, which further hindered the adoption of CSS. The CSS specification was uniform up to version 2.0. With the introduction of CSS3, the standard was modularized (i.e. individual modules develop independently and have their own versions).
Currently, there is no plan to release CSS4 as a single unified version; rather, new versions of modules will be released. More on this subject can be read here:
link
CSS is a formal language (i.e. it has a strictly defined grammar), but it is not a programming language (it cannot perform arbitrary algorithms). Essentially, CSS consists of style rules. Most style rules consist of a selector, followed by a declaration block (enclosed in curly braces) containing one or more declarations separated by semicolons. A declaration is a property–value pair. In principle, the CSS standard defines a closed set of properties and available values, although there are now solutions that allow you to extend CSS with your own properties.
A complete list of all available properties can be found here:
link
A file with the extension *.css containing expressions written in this language is called a stylesheet.
selector {
  property: value; /* declaration */
}
selector {
  property1: value1; /* declaration 1 */
  property2: value2; /* declaration 2 */
}
selector1,
selector2 {
  property1: value1;
  property2: value2;
}

A selector in CSS can take different forms. It may be an element name (an HTML tag), meaning that all occurrences of that HTML element will be styled according to the defined style rules. Another form is an arbitrary name, called a CSS class selector, which is denoted by a preceding dot (‘.’). An identifier (id) may also serve as a CSS selector. There is also a special selector, ‘*’, which applies to all HTML elements on the page. Additionally, a selector may include an attribute condition, which allows you to choose elements with a specific attribute value. In this way, by using various selectors, it is possible to precisely specify which elements on a webpage will be styled with the given CSS rules.
It is clear from the CSS grammar which type of selector is being used (e.g. element selector, class selector, etc.). We distinguish the following selectors:
Element Selector (highlighted in yellow) is simply the tag name (e.g.):
<!DOCTYPE html>
<html lang="pl">
  <head>
    <meta charset="UTF-8" />
    <meta name="viewport" content="width=device-width, initial-scale=1.0" />
    <title>Element Selectors</title>
    <style>
      /* Paragraph text will be crimson */
      p {
        color: crimson;
      }
      /* h1 text will be black */
      h1 {
        color: black;
      }
      /* In a preformatted section, text will be orange */
      pre {
        color: #ffaa00;
      }
    </style>
  </head>
  <body>
    <h1>Heading</h1>
    <p>Paragraph</p>
    <pre>Preformatted section</pre>
  </body>
</html>
Class Selector – A class selector is denoted by a dot (.) preceding the class name to which it applies. When naming classes, you should:
- Avoid keywords and HTML tag names (e.g.
.divor.spanare not recommended). - Use a short and descriptive name (e.g.
.header,.btn-light). - Not include non-English characters.
- For multi-word names, use camelCase or separate words with a dash (e.g.
.btn-pressedor.btnPressed). - Follow the chosen convention consistently throughout the document or website.
- The same class can be applied to any HTML element.
<!DOCTYPE html>
<html lang="pl">
  <head>
    <meta charset="UTF-8" />
    <meta name="viewport" content="width=device-width, initial-scale=1.0" />
    <title>Class Selectors</title>
    <style>
      /* Text will be crimson */
      .class1 {
        color: crimson;
      }
      /* Text will be very small */
      .class2 {
        font-size: xx-small;
      }
    </style>
  </head>
  <body>
    <p class="class1">Paragraph 1</p>
    <p class="class2">Paragraph 2</p>
    <!-- Paragraph 3 uses two classes. The text will be crimson and small. -->
    <p class="class1 class2">Paragraph 3</p>
  </body>
</html>
ID Selector – An ID selector is denoted by a hash (#) preceding the identifier name.
<!DOCTYPE html>
<html lang="pl">
  <head>
    <meta charset="UTF-8" />
    <meta name="viewport" content="width=device-width, initial-scale=1.0" />
    <title>ID Selectors</title>
    <style>
      /* Text will be crimson */
      #paragraph1 {
        color: crimson;
      }
      /* Text will be very small */
      #paragraph2 {
        font-size: xx-small;
      }
    </style>
  </head>
  <body>
    <p id="paragraph1">Paragraph 1</p>
    <p id="paragraph2">Paragraph 2</p>
  </body>
</html>
Attribute Selector – To the element name, add an expression enclosed in square brackets [] where you define an attribute or an attribute–value pair that the element must have.
<!DOCTYPE html>
<html lang="pl">
  <head>
    <meta charset="UTF-8" />
    <meta name="viewport" content="width=device-width, initial-scale=1.0" />
    <title>Attribute Selectors</title>
    <style>
      input[type="text"] {
        border: 1px solid #ccc;
        padding: 5px;
      }
    </style>
  </head>
  <body>
    <input type="text" placeholder="Enter something" />
    <!-- This input will be styled because its type is "text" -->
    <input type="password" placeholder="Password" />
    <!-- This input will not be styled, because it is not type "text" -->
  </body>
</html>
Pseudo-class Selector – Denoted by a colon (:) before the pseudo-class name. Pseudo-classes allow you to create dynamic and interactive effects on a webpage. They define an element’s behavior in a particular state (e.g. when hovered over or clicked) rather than relating to its position in the document.
<!DOCTYPE html>
<html lang="pl">
  <head>
    <meta charset="UTF-8" />
    <meta name="viewport" content="width=device-width, initial-scale=1.0" />
    <title>Pseudo-class Selectors</title>
    <style>
      a:hover {
        color: red;
      }
    </style>
  </head>
  <body>
    <a href="https://www.example.com"
      >Hover over this link to change its color</a
    >
  </body>
</html>
Pseudo-element Selector – Pseudo-elements allow you to add content or style specific parts of an element, such as the first letter, the first line, or content before or after an element. Typically, these elements do not exist as separate HTML tags in the document but are part of an element’s content that can be styled. The selector is created by appending :: followed by the pseudo-element name to the element name.
<!DOCTYPE html>
<html lang="pl">
  <head>
    <meta charset="UTF-8" />
    <meta name="viewport" content="width=device-width, initial-scale=1.0" />
    <title>Pseudo-element Selectors</title>
    <style>
      p::before {
        content: "Before the paragraph: ";
        font-weight: bold;
        color: blue;
      }
    </style>
  </head>
  <body>
    <p>This is a regular paragraph.</p>
  </body>
</html>
For further information, see: link
Applying CSS Styles:
• Inline styles – declared using the style attribute on an individual element. Using this method exclusively is a bad practice! You should generally use CSS stylesheets; inline styles should only be used when you need to style an individual element in a unique way (especially if an appropriate selector in the stylesheet would be overly complex). Inline styles do not have selectors. A clear disadvantage is that they are “one-time use”—you would have to define them separately for every element, which is inefficient and makes managing larger HTML documents difficult:
<tag style="color: lightblue;">content of the tag</tag>
<tag>this content will not be styled</tag>
• Internal styles – should be declared within the <head> section inside a <style> tag. In earlier days of the Web, when pages were relatively simple (for example, personal websites), it was often sufficient to define a few concise rules within the HTML document. Nowadays, this technique is less common because webpages and web applications are generally too complex for this solution to be practical:
<head>
  <meta charset="UTF-8" />
  <title>Title</title>
  <style>
    selector {
      property: value;
    }
  </style>
</head>
• External styles – linking to an external stylesheet defined in a separate file with a *.css extension. This file may reside locally on the server (using a relative path) or on an external server (using an absolute URL). This is now the primary way to use CSS. External stylesheets are included in the <head> using the <link> element:
<head>
  <meta charset="UTF-8" />
  <title>Title</title>
  <link rel="stylesheet" href="styles.css" />
  <link rel="stylesheet" href="https://www.example.com/styles.css" />
</head>
Selectors can be combined. Several combinators (known as combinators) are available that define which elements the selected styles should apply to.
| Combinator | Syntax | Description |
|---|---|---|
| Descendant Combinator | A B |
Element B is a descendant of element A (at any level); B must appear inside A. |
| Child Combinator | A > B |
Element B is a direct child of A; B must appear immediately inside A. |
| Adjacent Sibling Combinator | A + B |
Element B immediately follows A on the same level (i.e. they share the same parent). |
| General Sibling Combinator | A ~ B |
(For example, h2 ~ p) selects all p elements that appear after an h2 element, regardless of their number. |
| Group Combinator | A, B |
(For example, h1, h2, h3) allows you to select several different elements; in this case, all h1, h2, and h3 tags. |
As a rule, stylesheets exhibit inheritance—an HTML element that is a child of another element will, by default, inherit the same property values as its parent. However, the CSS standard is not entirely consistent here because not all properties are inherited. In practice, it is possible to use multiple stylesheets in one document, but this may cause conflicts between different stylesheets regarding how an element is ultimately rendered. Additionally, there are stylesheets of different levels (browser, author, and user) that have a specific order of evaluation. In practice, a specific algorithm determines a deterministic hierarchy of which style will ultimately be applied. Also, some properties have default values even if they are not explicitly defined. In practice, to work efficiently with CSS, one must learn the interplay between cascading, specificity, and inheritance. More information can be found here:
What happens if multiple selectors refer to the same part of an HTML document and define the same property? For example:
<!DOCTYPE html>
<html lang="pl">
  <head>
    <meta charset="UTF-8" />
    <meta name="viewport" content="width=device-width, initial-scale=1.0" />
    <title>Selectors</title>
    <style>
      p {
        color: red;
      }
      .class1 {
        color: green;
      }
      #akapit {
        color: blue;
      }
    </style>
  </head>
  <body>
    <p class="class1" id="akapit1">Paragraph</p>
  </body>
</html>
In this case, the algorithm for calculating specificity will determine which style is applied.
- The number of ID selectors (most important): Each occurrence of an ID selector (e.g.
#myId) increases specificity by 100. - The number of class and attribute selectors: Each occurrence of a class selector (
.myClass) or attribute selector (e.g.[type="text"]) increases specificity by 10. - The number of element and pseudo-element selectors: Each occurrence of an element selector (e.g.
div) or pseudo-element (e.g.::before) increases specificity by 1.

If two rules have the same specificity, the last one defined in the stylesheet is applied.
For example:
#myIdhas a specificity of 100.p.myClasshas a specificity of 11 (1 for element p and 10 for the class).ul li ahas a specificity of 3 (3 for elements).ul ol+lihas a specificity of 22 (2 for classes and 1 for an element).
Remember also how styles are defined. The most important styles are always inline. The only way to override an inline style is to use !important on that property (in general, !important changes the default evaluation of CSS rules).
Another important concept is the box model. Every element is represented as a rectangle that consists of the following areas:

More information can be found here: link. In practice, another complication is that there are essentially two independent box models which differ in whether the specified size of an element includes its padding and border. This distinction arose because one once-dominant browser ignored the CSS standard and introduced its own box model. The standard was later forced to accommodate this innovation. More here: link.
Another important issue is the default layout of elements on a page (the normal flow layout). Elements are by default rendered as either “block” or “inline”, but never both. More can be read here: link. The layout of an element can be changed with the display property (in later versions, entirely new options were also added).

Task 1.
Copy the following document:
<!DOCTYPE html>
<html>
  <head>
    <title>CSS Basics</title>
    <style>
      p {
        color: red; /* CSS comment */
      }
    </style>
  </head>
  <body>
    <p>This paragraph will be red.</p>
    <p>This one as well.</p>
    <p>And so will every other paragraph.</p>
  </body>
</html>
- Add a style attribute to the second paragraph and change its text color to green.
- Add an
<h1>element with the text “Akapity w CSS” (“Paragraphs in CSS”) and then add an appropriate selector that sets its text color to orange and adds an underline. - Add a
<p>element to the HTML document, assign it anid="special", and then add an appropriate selector that changes only this element’s background color to light yellow and its text color to black. - Add a class called
examplein your stylesheet that defines an italic font, 10px padding, and 50px margin. Then add another<p>element and apply that class. Next, add a<span>element and also apply that class.
Remember to ensure that the elements contain non-empty content so that you can visually observe the styling effects.
Task 2.
Create a valid HTML document and place the following rules in the head section:
body {
  width: 400px;
  height: 200px;
  margin: 0 auto;
  background-color: #b8ebc3;
  padding: 0 20px 20px 20px;
  border: 5px solid black;
}
img {
  max-width: 20px;
  max-height: 20px;
}
section {
  border: 1px solid red;
}
span {
  background-color: aqua;
}
The body tag should contain:
<body>
  <section>Lorem ipsum</section>
  <section>Lorem ipsum <span>abc</span></section>
  <section>Lorem ipsum <img src="obraz.png" alt="image" /></section>
</body>
The image should be at least 200×200px.
- Open developer tools (F12 or Fn+F12) and then disable the properties in the body selector one by one. Observe how the box model is affected.

- Next, modify the img selector so that the image’s maximum size is doubled (i.e. 40×40px). What effect does this change have on the box model of the parent element?
- Now, set the exact size of the image to 200×200px. What happens? Then remove the width and height properties from the body selector—what is the effect?
- Modify the padding and margin properties for the span selector. Can you explain the resulting rendering?
- In the same section, add a div element and also set its padding and margin using a selector. What is the effect this time?
- Add the property
box-sizing: border-box;to the body element. What change does this cause? - In the span selector, successively set the following display values:
display: inline; /* default value for span */
display: block;
display: inline-block;
What impact do these values have on the box model of both the span element and its parent?
Task 3.
Replicate the form from previous lab sessions, but this time have it look as shown below. Use an external stylesheet.
The following properties were used:
Colors:
#414141
#fbfbfb
#5d4e49
#e4d3ce
Font:
Corbel

Then create another stylesheet so that the same form appears as shown below:
Colors:
#fefefe
#0033A0
Font:
Open Sans

Task 4.
Copy the following example. Read the article about CSS inheritance: link. Then modify the example so that:
- The
<p>element inherits the border property. - The
<p>element resets to the default values for all properties. Use the special propertyall. - The
<p>element takes on all the same properties as its parent. Again, useall.
<!DOCTYPE html>
<html lang="en">
  <head>
    <meta charset="UTF-8" />
    <meta name="viewport" content="width=device-width, initial-scale=1.0" />
    <title>CSS Inheritance</title>
    <style>
      section {
        border: 1px dashed red;
        color: red;
      }
    </style>
  </head>
  <body>
    <section>
      This element will be bordered and have red text.
      <p>This element will not be bordered, but will have red text.</p>
    </section>
  </body>
</html>
Task 5.
Next, create a stylesheet called cascade_example.css:
section {
  border: 5px solid orange;
  color: white;
}
- Include this stylesheet using a
<link>element in the head, placed before the<style>element. What is the effect on the document’s rendering? In developer tools, inspect the styling rules for thesectionelement—what do you observe? - Then move the
<link>element below the<style>element. What do you observe now? - Add the declaration:
background-color: black;
What is the effect when the stylesheet is placed both before and after the<style>element? - Modify the stylesheet as follows:
border: 5px solid orange !important;
What is the effect when the stylesheet is placed both before and after the<style>element? - Add an inline style attribute to the section element:
style="color: #000;"
What is the effect when the stylesheet is placed both before and after the<style>element? - Using the tutorial link, add a user stylesheet in your browser and change the color property to something different from the one specified; also set the padding to 100px. Chrome is preferred, using an extension so that these changes are not permanent. What effect did these changes have? Using developer tools to compare the effect with and without the inline style may be helpful.
Task 6.
Define CSS styles so that:
- Adding the class
"row-stripes"to a table makes even-numbered rows have the color#73BBE6. If the table has headers, they should have a background color of#666652. - Adding the class
"col-stripes"to a table makes even-numbered columns have the color#73BBE6. If the table has headers, they should have a background color of#666652.
Adding the class should work on a table of any size.
Test the style on the following table:
| Header 1 | Header 2 | Header 3 |
|---|---|---|
| 1 | value 1 | technology |
| 2 | value 2 | internet |
Task 7.
Define styles for the following HTML:
<ul class="nav">
  <li class="nav-item">Home</li>
  <li class="nav-item">About</li>
  <li class="nav-item">Contact</li>
</ul>
and at the same time define the following CSS:
li {
  color: red;
}
ul > li {
  color: blue;
}
.nav-item {
  color: green;
}
- What is the rendering effect of this element? Do you know what caused this effect?
- Hover over a selector in VSCode to display its specificity.

You may also use an online specificity calculator (for practice, see: link).
Check the specificity of the elements. Which one is “strongest”? - Modify the CSS stylesheet to the following:
#nav > .nav-item:hover {
  color: pink;
}
#nav > li:hover {
  color: brown;
}
li.nav-item:hover {
  color: orange;
}
At the same time, replace the class
navon the<ul>element with an id:id="nav". Recalculate the specificity of the selectors using an online calculator and list their order of “strength”. - Consider the following rules:
h1 {
  font-size: 60pt;
}
#thisOne {
  color: brown;
}
#thisOne h1 {
  font-size: 60pt;
  color: chocolate;
}
#thatOne {
  color: black;
  font-size: 10pt;
}
button {
  background-color: chocolate;
  color: beige;
  border: 0;
  border-radius: 10px;
}
#thirdOne {
  color: black;
  font-weight: bold;
}
#btn-light {
  color: chocolate;
  background-color: beige;
  border: 0;
  border-radius: 10px;
}
section p {
  color: black;
  font-family: Corbel;
}
These rules style the following HTML fragment:
<section id="thisOne"> <h1>Header</h1> <button>button</button> <p id="thatOne">This is a paragraph.</p> </section> <section style="border: #000 solid 2px;"> <h1>Header</h1> <button>another button</button> </section> <p id="thirdOne">This is another paragraph.</p> <section> <button id="btn-light">another button</button> <p>This is a third paragraph.</p> </section>- Do you think these rules are written optimally?
- Replace the rules above so that the document renders the same, but the selectors are simpler and do not contain redundant properties. Replace the identifier
btn-lightwith a class of the same name. Avoid using inline styles. Use your knowledge of specificity and inheritance.
Task 6.
Define CSS styles that cause the following:
- Adding the class
"row-stripes"to a table causes even-numbered rows to have the color#73BBE6. If the table has headers, they should have a background color of#666652. - Adding the class
"col-stripes"to a table causes even-numbered columns to have the color#73BBE6. If the table has headers, they should have a background color of#666652.
Test the style on the following table:
| Header 1 | Header 2 | Header 3 |
|---|---|---|
| 1 | value 1 | technology |
| 2 | value 2 | internet |
Task 7.
Define CSS styles for the following webpage structure using these elements:
<hgroup>– used for grouping headings<h1>–<h6>that form a section’s hierarchy.<header>– used to contain information or elements usually placed at the top of a page that provide general information about the page or section.<article>– semantically represents a section or content that forms an independent, self-contained part of a webpage or document.<section>– for content that is thematically or conceptually related.<aside>– for additional information that may be interesting but is not essential to understanding the main content.<nav>– designates a navigation section of a webpage.<menu>– creates a menu; it is used instead of the<ul>element to semantically indicate that the options defined within it (using<li>) form a menu.
For every second-level heading, add a unique id attribute. Then create a menu consisting of hyperlinks to the corresponding headings.
Hyperlinks can reference headings by setting the href attribute to #[element id]:
<a href="#heading">Go to the heading with id "heading".</a>
<div style="display: block; height: 5000px;"></div>
<h2 id="heading">Heading with id "heading"</h2>
Task 8.[*]
Create a document that serves as your first blog post. Use the knowledge you have acquired to create the content of the post, add images, and include an interesting fact. The interesting fact should be defined using the <details> and <summary> tags.
Also consider using:
<mark><cite><ruby>
Creating Complex Layouts, Responsive Web Design (RWD)
1. CSS Animations
In the past, animations on webpages were implemented, for example, in Adobe Flash. Later on, JavaScript was also used (by writing scripts that dynamically created and removed HTML elements with various property values).
However, nowadays many animations are natively supported by CSS, while JavaScript plays a supporting role (for example, triggering an animation).
To animate an element, you must assign it the animation-name property. Then, you define an at-rule @keyframes that uses that name as its identifier. You must also set the animation duration using the animation-duration property, which by default is 0 (so the animation will not play). If the animation is only meant to have two states, you can use the keywords from and to. Otherwise, you can use percentage values from 0 to 100 (which correspond to from (0%) and to (100%)).
<!DOCTYPE html>
<html>
  <head>
    <style>
      div {
        width: 100px;
        height: 100px;
        background-color: rgb(0, 51, 160); /* base color */
        animation-name: example;
        animation-duration: 15s;
      }
      @keyframes example {
        0% {
          background-color: rgb(128, 0, 0);
        }
        25% {
          background-color: rgb(104, 73, 28);
        }
        50% {
          background-color: rgb(127, 64, 112);
        }
        100% {
          background-color: rgb(0, 102, 51);
        }
      }
    </style>
  </head>
  <body>
    <h1>The colors of the University of Rzeszów Colleges are as follows:</h1>
    <div></div>
    <p>
      <b>Note:</b> When the animation ends, the element will return to its
      default state.
    </p>
  </body>
</html>
Task 1.
Write an animation that animates the University of Rzeszów logo from its standard version to a monochromatic version (provided in the assets). Use the background-image and background-size properties.
- Let the animation run infinitely (set animation-iteration-count) and have a duration of 6s. Animate a single
div. - Then add an animation that, on mouse hover, doubles the image size over 2s. Let a second
divhave this animation. - Next, add a third
divthat initially animates between the monochromatic and colored version, but on hover additionally rotates 360 degrees. - Consider how you might use animation-composition to combine several animations without having to write a new animation that is the “sum” of several independent animations.
Task 2.
Using CSS, create the following spinner:
Use the animation-timing-function property to ensure the animation runs smoothly.
Task 3.
Study the example that defines a custom checkbox (created by the page author). Then add an animation that, upon activation of the checkbox:
- Doubles its size,
- Changes the cursor color to green,
- Lasts for 2s and then deactivates.
Next, add to the form a submit button that is animated as follows:
- Its border changes to green,
- The button scales to 120%,
- The button becomes round and displays the text:
✔.
Task 4.
Make the form from the previous task also appear as an animated element—i.e. have it expand dynamically during animation.
Refer to this example: link.
Task 5.
Review the example grid_areas.html. In that example, the main container first defines the grid-template-areas property, and then subsequent elements are assigned the corresponding grid-area value.
- In Firefox, enable the following preview:

and see how the page is divided into areas. - Using the unit fr, force the columns to be exactly equal in width.
- Then (even though it may not be very practical) set the width of the first column to be 5 times larger than the second.
- Return to the initial state. Then add a media query that changes the grid to a single-column layout with four rows for mobile devices. Let the grid-template-areas remain as they were, but adapt to the new layout. Also, ensure that both the navigation bar and the site map become collapsible/expandable.
Task 6.
A common element on webpages is a slider. This is a layout in which a group of elements is displayed similar to a slideshow (hence the name); that is, one element is visible at a time while navigation buttons allow you to switch to the next element. A similar solution is a carousel, where several elements are visible simultaneously and navigation buttons allow you to cycle through the elements, usually in a circular fashion (i.e. the last element switches back to the first).
- Examine the provided slider example and check if it works correctly in both Firefox and Chrome.
- Modify it so that the navigation links change from a numerical display to the commonly used filled dots in this context.
Task 7.
Open the project created in a design tool (e.g., Figma):
Figma: link.
Based on the tasks completed so far, create a responsive implementation of the homepage fragment shown below for both mobile devices and desktops:

The font Roboto used on the page can be found at:
link

To access the full version of the Figma file:

Click Continue with Google, then use your MS Teams login (this is also your Google account).
For example, to determine the exact color scheme, click on an element:

If you are interested in an image, press Ctrl and click on the element:

A useful shortcut is Ctrl+Shift+E (to export all assets):

If you use it by clicking on a frame:

XML (Extensible Markup Language)
XML (Extensible Markup Language) is a language that was created as a way to simplify the syntax of SGML while retaining its main capabilities (i.e. the ability to define arbitrary documents and custom tags). Its syntax resembles that of HTML (and thus SGML), except that unlike HTML, it does not have predefined tags; rather, it is the programmer’s role to define their own tags. Optionally, one can attach a DTD (Document Type Definition) or an XML Schema as a kind of grammar that defines the conditions the document must meet to be valid. Some consider XML a meta-language, as it is used to define actual languages (i.e. languages that handle a specific use case, model a specific problem, etc.). It is also sometimes said that XML is a semistructured format, meaning that XML defines both its structure and content simultaneously.
XML differs from HTML in its much more rigorous approach to document formatting. While HTML is (in practice and de jure) “forgiving” with syntax errors, an XML parser will usually immediately throw a parsing error and halt further analysis if a mistake is found. This solution makes it much easier to write a correct XML parser, which is also much lighter than an HTML parser—a fact that matters in some applications.
XML is often used as a universal format for transmitting information between information systems (although in this context it is increasingly being replaced by JSON).
Another common use for XML is in configuration files.
XML has also become the basis for defining office documents such as those in the MS Office suite (Office Open XML) or
OpenDocument.
XML is also used to define the presentation layer (instead of, or similar to, HTML) in some applications (e.g. native Android apps, JavaFX).
Suppose we want to store information about an online store customer. In order to issue an invoice, you need to know their first and last name as well as their address. At the same time, it is possible that the mailing address (for delivery) is different from the address that should appear on the invoice.
This problem can be modeled by a document such as the following XML:
<?xml version="1.0" encoding="UTF-8"?>
<person>
    <name>Jan</name>
    <surname>Kowalski</surname>
    <address>
        <city>Rzeszów</city>
        <street>Rejtana 16c</street>
    </address>
    <address type="correspondence">
        <city>Rzeszów</city>
        <street>Rejtana 16c</street>
    </address>
</person>
- The first line contains an XML declaration. The declaration is optional; if the programmer/author does not provide one, the default value is assumed:
<?xml version="1.0" encoding="UTF-8" standalone="no" ?>Its purpose is to specify the XML version and the encoding used to save the document. In addition, the declaration can also include information regarding whether the document contains references to external data sources. - Next in the document is the
<person>element, which is the root of the document.- Every valid XML document must have exactly one root. (Terminology in XML is derived from family tree nomenclature; hence, the
<person>element is the parent of the elements directly inside it.) - You can define infinitely many child elements within the root.
- Every valid XML document must have exactly one root. (Terminology in XML is derived from family tree nomenclature; hence, the
- Inside the
<person>element are the child elements:<name>,<surname>, and<address>.- In most sources, the
<name>,<surname>, and<address>elements are defined as children of<person>. - Child elements can also have their own children, as in the example above where
<address>contains<city>and<street>.
- In most sources, the
- The second
<address>element (child of<person>) has an attributetypethat indicates whether it is a correspondence address or a residential address.- Attributes are defined as key–value pairs separated by an equals sign.
- An element may have infinitely many attributes.
- Attribute values in XML must be enclosed in quotes.
- Attributes are often used to store meta-information, although they can also be used to store data.
- There are limitations that can guide the choice between attributes and child elements. An element cannot have two or more attributes with the same name, and attributes accept only string values, which can be limiting in some cases.
Element Names:
- Must begin with a letter or underscore (“_”).
- May contain letters, digits, underscores (“_”), periods (“.”), and hyphens (“-”).
- Must not contain spaces.
Attribute Names:
- Follow similar rules as element names.
- Each attribute within a given element must have a unique name.
The result when displaying the above example in a browser:
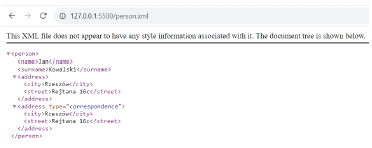
Although this form is correct according to the XML standard, there is one problem at the moment: no rules have been defined as to what the <person> element should contain (i.e. no grammar has been defined to specify the validity of this particular XML document).
It is therefore possible to define such an XML document:
<?xml version="1.0" encoding="UTF-8"?>
<person>
    <name>Jan</name>
    <surname>Kowalski</surname>
    <address>
        <city>Rzeszów</city>
        <street>Rejtana 16c</street>
    </address>
    <address type="correspondence">
        <city>Rzeszów</city>
        <street>Rejtana 16c</street>
    </address>
    <some></some>
    <additional></additional>
</person>
It has two extra elements (and it is hard to determine what information they store about the customer). However, as long as we do not break the XML language rules (for example, by failing to close a tag), this document will be considered valid XML. Although adding redundant elements may be neutral in the context of the given problem, if, for example, the first and last name were omitted, a correct invoice could not be issued.
Below is an example of an incorrectly formatted XML document and the result of its display in a browser:
<?xml version="1.0" encoding="UTF-8"?>
<person>
    <name>Jan</name>
    <surname>Kowalski</surname>
    <address>
        <city>Rzeszów</city>
        <street>Rejtana 16c</street>
    </address>
    <address type="correspondence">
        <city>Rzeszów</city>
        <street>Rejtana 16c</street>
    </address>
    <some></some>
    <additional>
</person>

As mentioned earlier, it is possible to define the correct structure of an XML document using a DTD (Document Type Definition). DTD is essentially an independent formal language used to describe what a valid document should contain. DTD was developed in the days of SGML. It is worth noting that in the past DTD was also used in HTML, and for a period its use was mandatory.
Keep in mind that there are differences between the DTDs of SGML, HTML, and XML (regarding the functionalities offered by the language).
The standard way to include a DTD in a document is by using a Document Type Declaration (DOCTYPE).
For example, to add a DTD to a document (an internal DTD):
<?xml version="1.0" encoding="UTF-8"?>
<!DOCTYPE person [
  <!ELEMENT person (name, surname, address+)>
  <!ELEMENT name (#PCDATA)>
  <!ELEMENT surname (#PCDATA)>
  <!ELEMENT address (city, street)>
  <!ELEMENT city (#PCDATA)>
  <!ELEMENT street (#PCDATA)>
  <!ATTLIST address type (residence | correspondence) "residence">
]>
<person>
    <name>Jan</name>
    <surname>Kowalski</surname>
    <address>
        <city>Rzeszów</city>
        <street>Rejtana 16c</street>
    </address>
    <address type="correspondence">
        <city>Rzeszów</city>
        <street>Rejtana 16c</street>
    </address>
</person>
The following rules are established:
- The main (root) element is person.
- The person element consists of the elements name, surname, and address.
- There must be exactly one name and one surname element, while there can be many address elements (at least one must be present, indicated by the “+”).
- The name and surname elements are of type PCDATA (Parsed Character Data), meaning they are to be parsed by XML (i.e. they may contain text or nested elements).
- The address element consists of 2 elements: city and street, which are also of type PCDATA.
- The address element has an attribute type, which can take on the values residence or correspondence, with a default value of residence (if not explicitly specified).
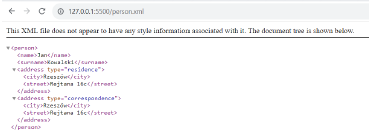
As you can see, when the document is displayed, the type attribute is automatically added with the default value for the first address element.
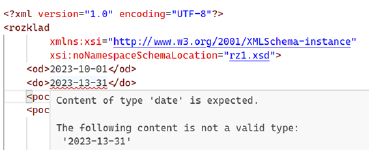
This time, if you try to add the elements some and additional, the XML validator will return the following errors:

Defining complex DTDs within documents is generally impractical. In practice, external DTDs are often used:
<?xml version="1.0" encoding="UTF-8"?>
<!DOCTYPE person SYSTEM "person.dtd">
<person>
    <name>Jan</name>
    <surname>Kowalski</surname>
    <address>
        <city>Rzeszów</city>
        <street>Rejtana 16c</street>
    </address>
    <address type="correspondence">
        <city>Rzeszów</city>
        <street>Rejtana 16c</street>
    </address>
</person>
And the external DTD file (person.dtd):
<!ELEMENT person (name, surname, address+)>
<!ELEMENT name (#PCDATA)>
<!ELEMENT surname (#PCDATA)>
<!ELEMENT address (city, street)>
<!ELEMENT city (#PCDATA)>
<!ELEMENT street (#PCDATA)>
<!ATTLIST address type (residence | correspondence) "residence">
The modifier SYSTEM indicates that we are not referring to an official standard (i.e. we are using a local DTD), to which a correct URL must then be provided; alternatively, one can use PUBLIC, where a PublicID must be provided and optionally a URL (though in practice it is usually mandatory).
In older versions of HTML, for example, a DOCTYPE such as the following was used:
<!DOCTYPE HTML PUBLIC "-//W3C//DTD HTML 4.01 Transitional//EN"
   "http://www.w3.org/TR/html4/loose.dtd">
<html>
  ...
</html>
Whereas the DOCTYPE for XHTML could look like this:
<?xml version="1.0" encoding="UTF-8"?>
<!DOCTYPE html PUBLIC "-//W3C//DTD XHTML 1.0 Strict//EN"
     "http://www.w3.org/TR/xhtml1/DTD/xhtml1-strict.dtd">
<html xmlns="http://www.w3.org/1999/xhtml" xml:lang="en" lang="en">
  ...
</html>
Because DTD was inherited from SGML, various shortcomings and limitations were later observed with XML, so it was eventually decided to replace it with XML Schema, which is now the dominant approach to defining the structure of a valid XML document.
XML Schema is essentially an XML document that defines the correct structure of another XML document. To use XML Schema, one defines an XSD (XML Schema Definition). The attribute xmlns defines a specific namespace (from the XML namespace). If you add a prefix to this attribute (which can be arbitrary), you can further require that elements defined in this namespace be prefixed accordingly. This is mainly to ensure that, in cases where element names from different sources overlap, they can be distinguished. Note that the value of xmlns should be a URI or URN, which should be unique by principle, even if the referenced resource may not actually exist (i.e. it will not be a valid URL that can be opened).
For example, the following XML for defining a mobile application layout in Android refers to a namespace via a link that, in this context, is essentially a URI and not a URL:
<FrameLayout xmlns:android="http://schemas.android.com/apk/res/android"
    android:layout_width="match_parent"
    android:layout_height="match_parent"
    android:id="@+id/container">
</FrameLayout>
It is important to note that XSD files are ultimately validated using DTD. There is theoretically an XSD for XML Schema itself: https://www.w3.org/2001/XMLSchema.xsd, although within it we have a reference to a DTD: https://www.w3.org/2001/XMLSchema. Similarly, there is an XSD for XML documents: https://www.w3.org/2001/03/xml.xsd, which also refers to the mentioned DTD.
Below is an example XSD (for the example discussed above):
<?xml version="1.0" encoding="UTF-8"?>
<xs:schema xmlns:xs="http://www.w3.org/2001/XMLSchema">
    <xs:attribute name="type" default="residence">
        <xs:simpleType>
            <xs:restriction base="xs:string">
                <xs:enumeration value="residence"/>
                <xs:enumeration value="correspondence"/>
            </xs:restriction>
        </xs:simpleType>
    </xs:attribute>

    <xs:element name="person">
        <xs:complexType>
            <xs:sequence>
                <xs:element name="name" type="xs:string" minOccurs="1"/>
                <xs:element name="surname" type="xs:string" minOccurs="1"/>
                <xs:element name="address" minOccurs="1" maxOccurs="unbounded">
                    <xs:complexType>
                        <xs:sequence>
                            <xs:element name="city" type="xs:string" minOccurs="1"/>
                            <xs:element name="street" type="xs:string" minOccurs="1"/>
                        </xs:sequence>
                        <xs:attribute ref="type"/>
                    </xs:complexType>
                </xs:element>
            </xs:sequence>
        </xs:complexType>
    </xs:element>
</xs:schema>
person.xsd
- A root element
<xs:schema>is created, which belongs to the namespacexs. The provided URL leads to a DTD file that defines a correct XSD document. - Using XSD syntax, the effect is generally equivalent to what was achieved with DTD.
Next, an XML document is created:
<?xml version="1.0" encoding="UTF-8"?>
<person xmlns:xsi="http://www.w3.org/2001/XMLSchema-instance"
    xsi:noNamespaceSchemaLocation="person.xsd">
    <name>Jan</name>
    <surname>Kowalski</surname>
    <address>
        <city>Rzeszów</city>
        <street>Rejtana 16c</street>
    </address>
    <address type="correspondence">
        <city>Rzeszów</city>
        <street>Rejtana 16c</street>
    </address>
</person>
person.xml
- The root element
personis declared and it is stated that it is an instance of the schema defined in the file person.xsd. At the same time, the defined schema does not create a separate namespace.
Additional materials:
- XML 1.0 Specification: link
- Document validity (both syntactic and structural):
- XML Schema 1.1 Specification: https://www.w3.org/XML/Schema.html#dev
- Examples of using XML Schema as a structure for XML documents: link
Lab Setup:
- Open Visual Studio Code.
- Install the “XML” extension: link
Task 1.
Propose both a DTD and an XSD for the following XML document. Test the result using any XML validator.
<?xml version="1.0" encoding="UTF-8"?>
<emails>
  <email>
    <to>address@mail.com</to>
    <from>Spam</from>
    <heading>Offer</heading>
    <body>Do you want to buy our products?</body>
  </email>
  <email>
    <to>address@mail.com</to>
    <from>coworker@mail.com</from>
    <heading>Document</heading>
    <body>Please see this document and reply asap.</body>
    <attachements>
      <attachement>
          <name>Document.odt</name>
      </attachement>
    </attachements>
  </email>
</emails>
Task 2.
Using an XSD available here:
link
define an XML document that is compliant with this XSD (and also declare this fact so that the parser/validator can validate the document in real time).
Task 3.
Create an example XML file named rozklad.xml concerning train timetables, according to the following requirements:
For a train timetable, information must be available about the validity period (start date and end date). For each train in the timetable, information should include:
- Train number (an integer),
- Carrier name (maximum 15 characters),
- Type of train (passenger, fast, express),
- An optional train name,
- Stations (at least 2) where the train stops, along with their names, arrival and departure times,
- A composition of 1–5 carriages (second-class carriages, first-class carriages, sleeping carriages, couchette carriages, and a restaurant carriage).
<?xml version="1.0" encoding="UTF-8"?>
<rozklad>
    <!-- file content goes here -->
</rozklad>
-
Open the completed rozklad.xml file in a web browser to verify that it parses correctly (i.e. it is well-formed).
-
Familiarize yourself with the basic concepts of XML Schema:
- XSD Data types,
- XSD Elements (element, all, sequence, complexType, simpleType, attribute),
- XSD Restrictions, as well as XML construction patterns:
- Global vs. local declarations,
- The Russian Doll pattern,
- The Salami Slice pattern,
- The Venetian Blind pattern,
- The Garden of Eden pattern.
link
link
link
-
Generate an initial definition of the structure for XML files meant to store train timetables:
- Fill in the root element
<rozklad>as shown below, - Then, in VSCode, place the cursor on the filename rz1.xsd and click the yellow lightbulb, selecting Generate missing rz1.xsd.
- An initial XML Schema (following the Russian Doll pattern) will be generated.
- Review the newly generated file and edit it so that it complies with all the requirements specified in the task.
- Fill in the root element
<rozklad xmlns:xsi="http://www.w3.org/2001/XMLSchema-instance"
         xsi:noNamespaceSchemaLocation="rz1.xsd">

- Return to rozklad.xml and test its structural validity.
-
Create a file rz2.xsd in which you prepare a definition of the document structure using the Venetian Blind pattern.
-
In rozklad.xml, replace the current reference from rz1.xsd with rz2.xsd. Then test the structural validity.
-
Try an online tool for generating XSD according to different patterns. Also, test the structural validity.
link
link
Task 4.
For the example person.xml, add the following line:
<?xml-stylesheet type="text/css" href="person.css"?>
Also add the following stylesheet:
* {
  margin: 10px;
}
person {
  display: flex;
  flex-direction: column;
  color: white;
  background-color: black;
}
address {
  border: 1px solid white;
}
• What is the rendering effect of the document this time?
In addition to the ability to style XML with CSS, it is also possible to convert it into another document (both XML and HTML). For this purpose, XSL (eXtensible Stylesheet Language) is used. When transforming XML to HTML, you can give it a more user-friendly structure and appearance.
Replace the CSS stylesheet with the following:
<?xml-stylesheet type="text/xsl" href="person.xsl"?>
<?xml version="1.0"?>
<xsl:stylesheet version="1.0" xmlns:xsl="http://www.w3.org/1999/XSL/Transform">
<xsl:template match="/">
<html>
<head>
<title>Orders</title>
<style>
* { margin: 10px; }
person {
display: flex;
flex-direction: column;
color: white;
background-color: black;
}
address {
border: 1px solid white;
}
</style>
</head>
<body>
<h2>Orders</h2>
<table class="my-table">
<tr>
<th>Name</th>
<th>Surname</th>
<th>Residence address</th>
<th>Correspondence address</th>
</tr>
<xsl:for-each select="person">
<tr>
<td><xsl:value-of select="name"/></td>
<td><xsl:value-of select="surname"/></td>
<xsl:for-each select="address">
<td>
<xsl:value-of select="city"/> 
<xsl:value-of select="street"/>
</td>
</xsl:for-each>
</tr>
</xsl:for-each>
</table>
</body>
</html>
</xsl:template>
</xsl:stylesheet>
Notice that XSL allows you to define nontrivial patterns. For example, the addresses in the table we create have the city and street concatenated.
• Render the XML transformed by XSL into HTML (in a tabular form).
• Modify the example so that the table shows several customers. This means that the XML must allow for multiple <person> elements (i.e. you could define an XML Schema for persons) that are correctly transformed into a table (which requires editing the XSL file). To avoid redundancy, use person.xsd by including it in persons.xsd using the include directive.
Creating Complex Page Layouts, Responsive Web Design (RWD)
1. CSS Animations
(This section was translated in a previous part.)
XML (Extensible Markup Language)
(This section was translated in a previous part.)
Creating Complex Page Layouts, RWD
(Previously translated sections.)
Creating Complex Layouts, Responsive Web Design (RWD)
(See previous sections.)
Advanced Layouts, RWD
1. Creating Complex Content Layouts, RWD
1. CSS Animations
(Already translated above.)
2. CSS Grid and Flexbox
(Already translated in previous sections.)
Creating Complex Content Layouts, Responsive Web Design (RWD)
1. Advanced CSS Animations, RWD
(This section and the ones that follow have been translated above.)
XML (Extensible Markup Language)
(Already translated above.)
Creating Complex Page Layouts, RWD
(See above sections.)
Creating Complex Layouts, Responsive Web Design (RWD)
(Previously translated.)
Creating Complex Layouts, RWD
(All previous sections have been translated.)
Creating Complex Content Layouts, RWD
1. CSS Animations
(Already translated.)
Creating Complex Layouts, Responsive Web Design (RWD)
(All sections above have now been translated.)
Creating Advanced Layouts, Responsive Web Design (RWD)
(The remainder of the document is provided below.)
Creating Complex Layouts, RWD
1. Creating Complex Content Layouts, RWD
1. Advanced CSS Animations, RWD
(Already translated above.)